Intro
For one issue (documented here), I had to reinstall the VMware tools on a Windows VM. After the reinstall, the screen resolution looked kinda weird. I had one of the highest Resolution on a Retina Display. But since it was so zoomed out, I couldn’t say that I was enjoying the high resolution. Adjusting the Resolution didn’t work either since it would change the screen size of the vm and leave a big black screen around it for all the unusable space (In full Screen Mode). I found out that the problem was in the VM Display Settings. Going back to the basics, this was actually behaving as designed.
In this post, we are going to take a look of how we can change the screen and resolution settings within VMware Fusion & Workstation and the effect the different options can have with each other.
Display Preferences for all VMs
Since I have a macbook, I use VMware Fusion. In VMware Fusion you can change the default Display behavior of all VMs. This can be found @ VMware Fusion Preferences… Display.
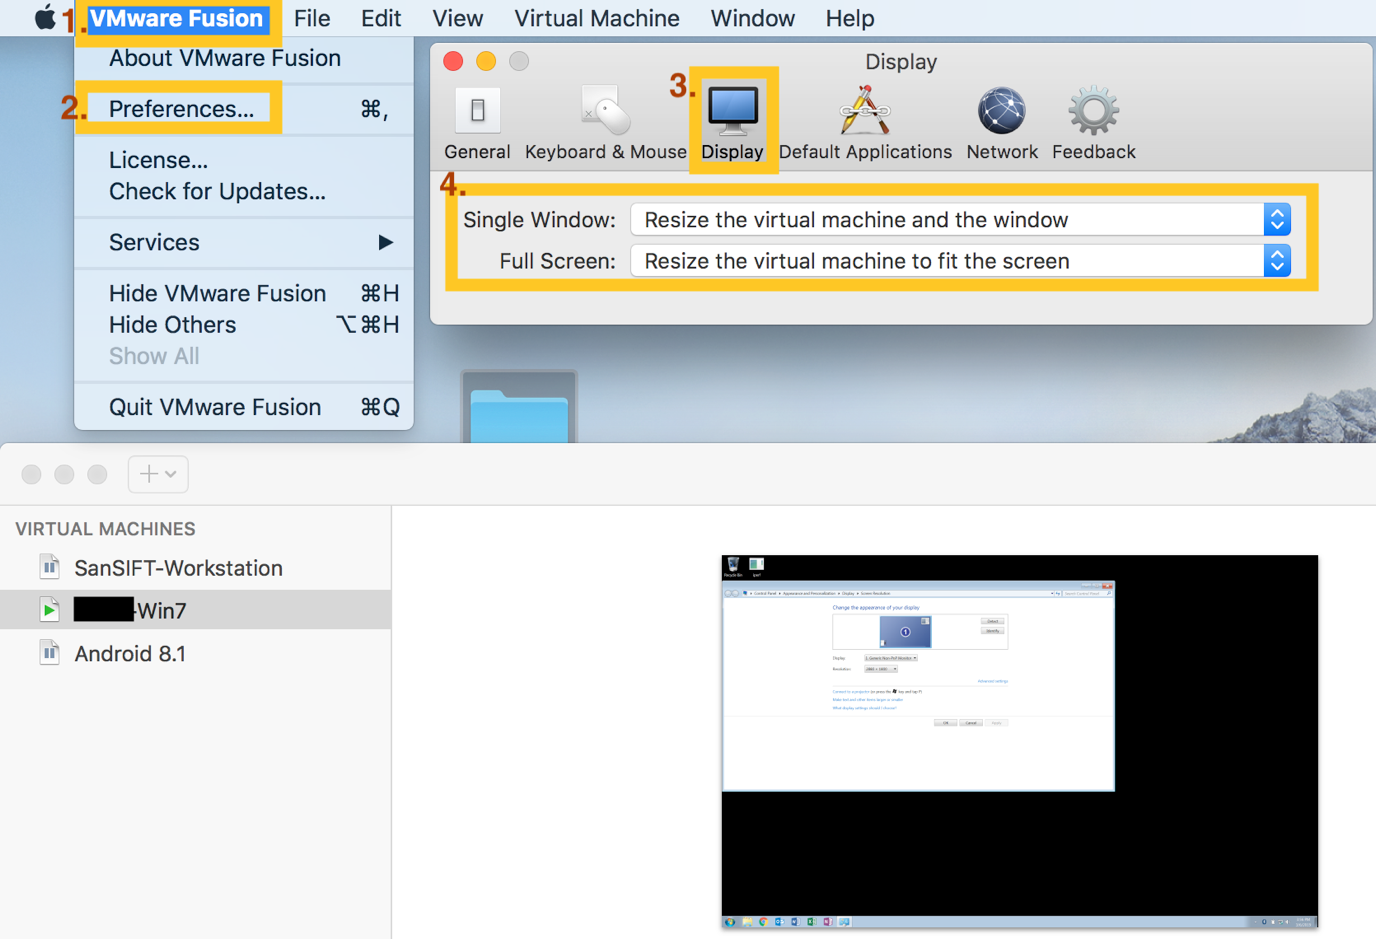
In the Display settings of VMware Fusion, you can configure the default display behavior of the VMs, both for “Full Screen” Windows as in a “Single Window”. This Means that during the creation of a VM, it will start with the default Display settings that you have set up here in your preferences. Just as shown in the picture above. This is quite handy if you always want to use the same type of configuration for your VMs their Console Windows or when the VMs are in full screen.
Display Preferences for a Single VM
It is possible that for some VMs, you want the Display settings to be different then their default. This is possible by going to Display settings of the VM itself. Which can be found @ Virtual Machine –> Settings … –> System Settings –> Display
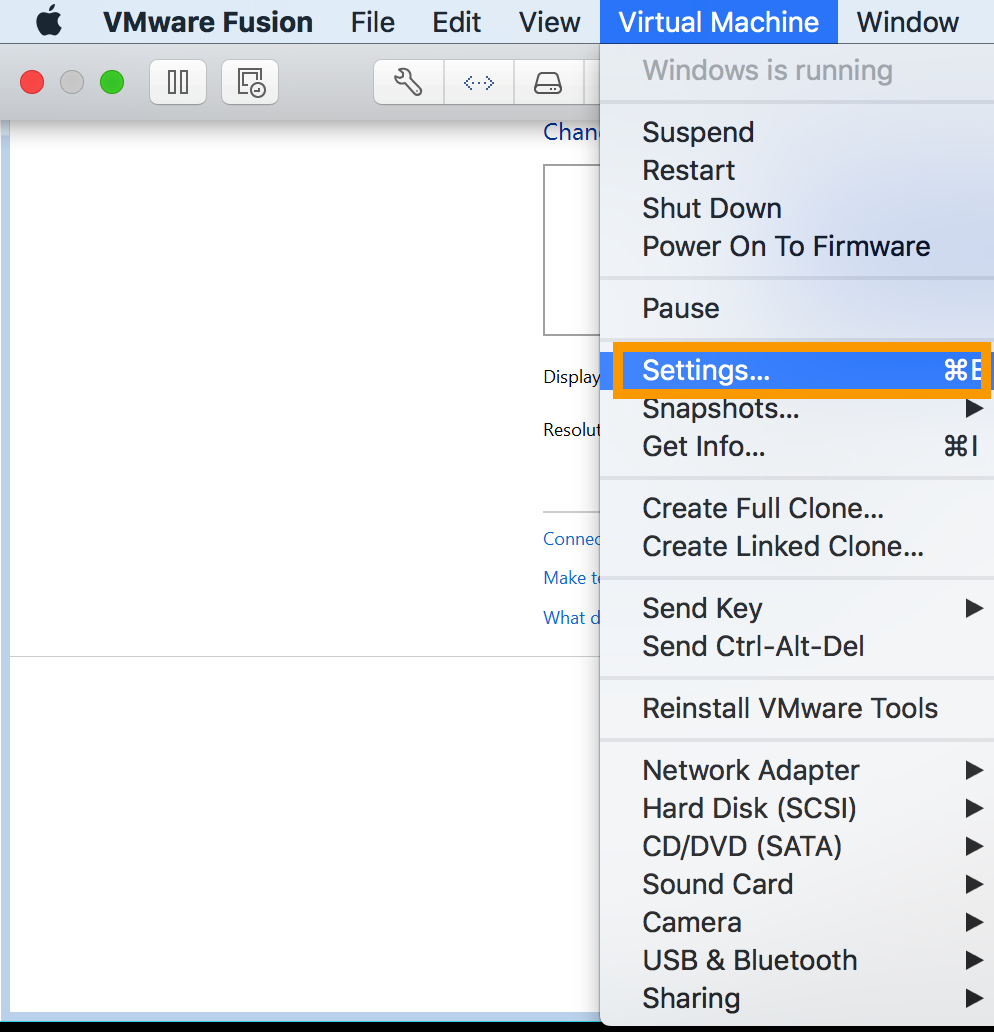
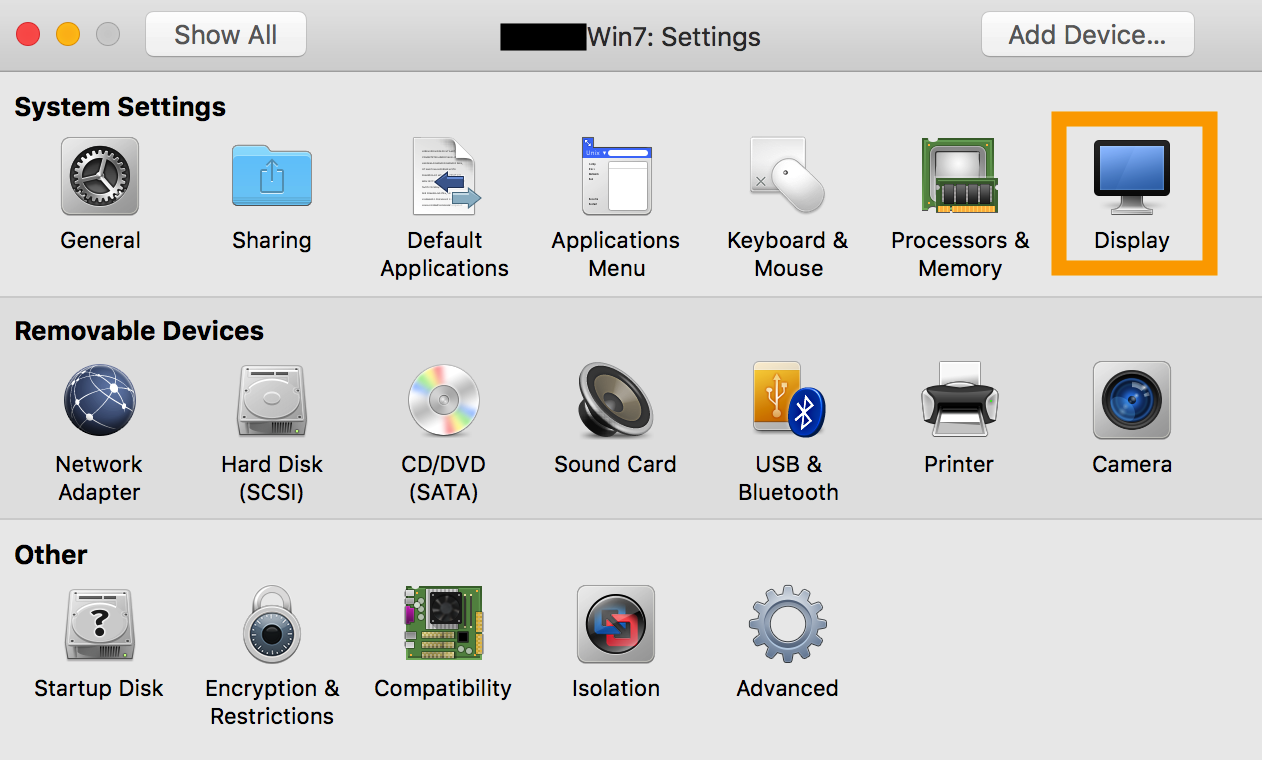
As you see, this shows the individual VM settings which give you a few more options.
You’ll notice that the default setting for both views is “Use Fusion Display Preferences”.
This refers back to the settings that we configured earlier at the preferences section of VMware Fusion.
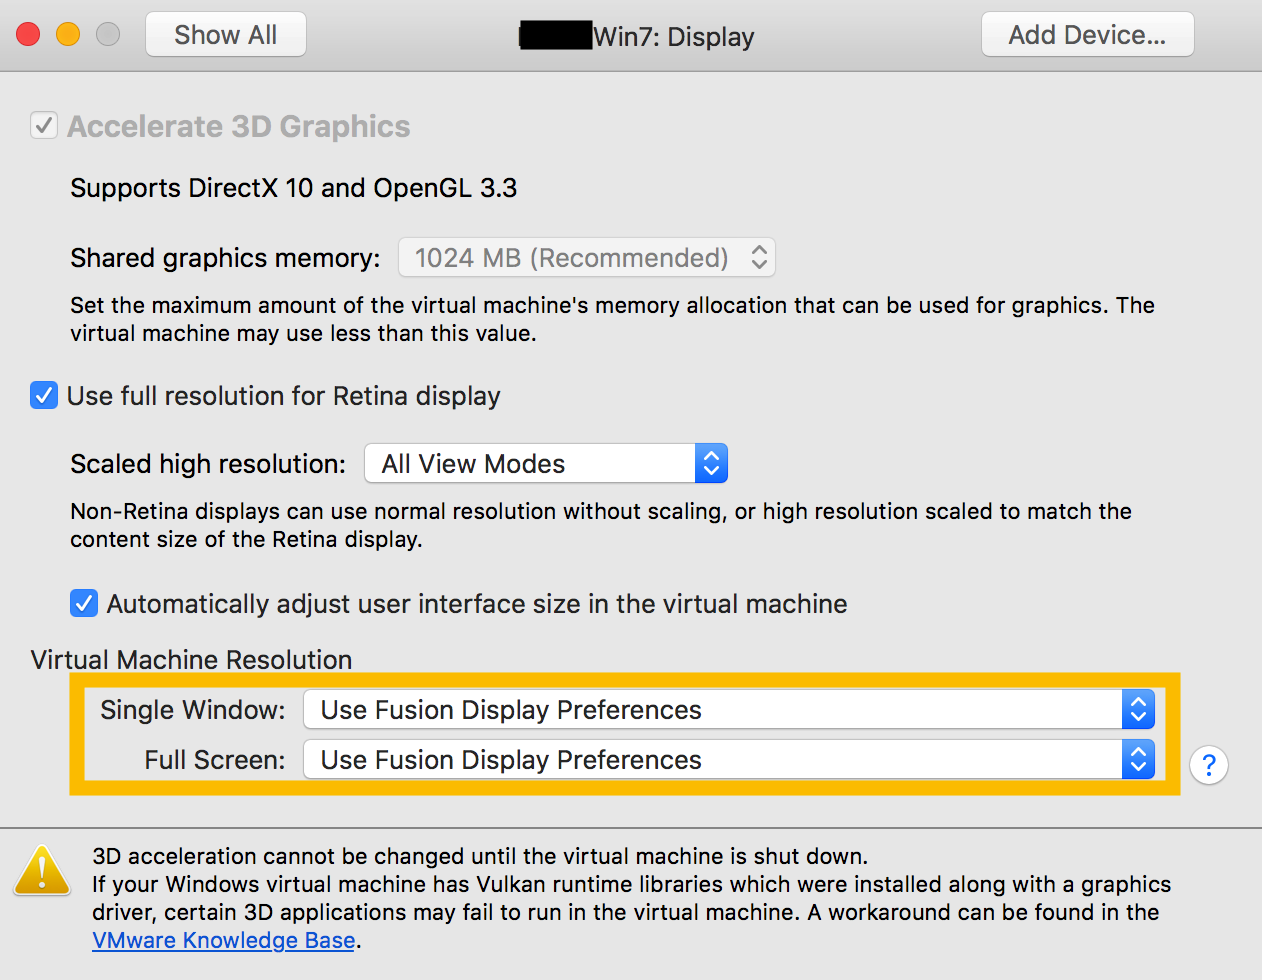
Both “Single Window” as “Full Screen” will have the same options as in the “Fusion Display Preferences” that you can select.
The Different Display options and the effect with some Resolutions
So an important thing to clarify is, that the display settings are options that you can choose within VMware Fusion. As said earlier this can be done on a vm basis or as an overall default setting that will apply to all vm’s that refer to it. The options dictate how the VM reacts within “Full Screen” or how it resize the vm in a single window.
The resolution is something that you configure within the VM. Simply explained, the resolution is a value that indicates the amount of pixels and quality a certain image, or screen has. The higher the Resolution the better the quality, if the screen supports it. However, a high resolution on a screen can also mean that the Operating System, becomes more zoomed out. Which doesn’t always give you the best experience if this becomes to high.
The Display option in VMware Fusion and the Resolution within a vm have a strong relationship, and will constantly interact with each other. Even though they look similar, they are different but do need each other. Simple said, the “Display Option” decides how it reacts towards the set resolution within a vm. This can be by stretching, centering or resizing the vm, and sometimes it decides to change the resolution within a vm.
Now lets look to the different Options in the “Display Preference”.
Single Window
Option 1 : Resize the virtual machine and the window
Explanation: With a Single window you have the possibility to change the window size of your vm constantly. When choosing this option, VMware Fusion will respect the resolution that is configured within the vm, and thus stretch the vm and resolution itself when you resize the window. This doesn’t change the resolution within the vm.
Option 2: Stretch the virtual machine in the window
Explanation: When choosing this option, VMware Fusion wil constantly change the resolution within the vm depending on the size of the windows that you choose. This way it will try to use the optimum quality of resolution in combination of the set window size. With this option VMware Fusion will change the resolution every time you change the window size of the vm.
Full Screen
Option 1: Center the virtual machine in the screen
Explanation: This option will choose the most optimum size of the VM depending on the configured resolution within the VM. This will give you the best quality with the chosen resolution. The drawback with this setting is that every Resolution that you choose in the vm, that doesn’t exactly fit your screen in “full screen” mode, will result into a black square / layer. It will center the window of the vm, but all the wasted space or unused screen will result in a black layer.
Example: Resolution is set to 1920 x 1200 and option selected is “Center the virtual machine in the screen”.
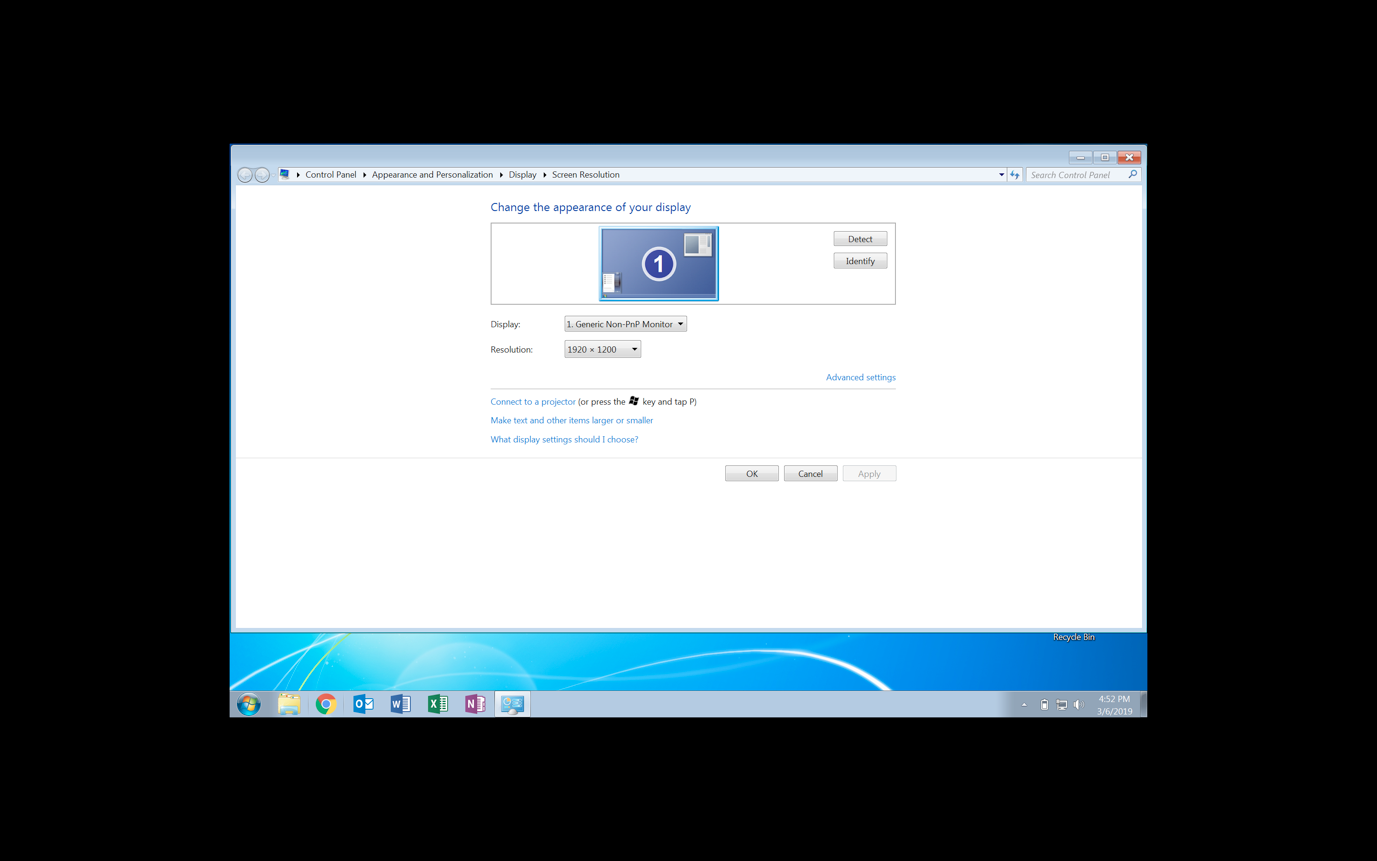
As explained, this will create a black square around the VM within “full screen”. Personally, I don’t like this option because of the wasted space on the screen, but I guess that some people find this more calming or let it help with their focus while choosing the optimum quality for their chosen resolution. *Do note that the first time you’ll set this option, it sometimes changes the resolution within a vm as well towards an optimum. However if you change the resolution afterwards within the vm, the screen around it will resize automatically for you.
Option 2: Stretch the virtual machine to fit the screen
Explanation: One of my favorite options. With this option, the vm will stretch itself in full screen, while respecting the resolution and not changing it. This mean that the quality can go down, but you can easily make the objects in the vm bigger while having a full screen. By finding the right resolution, you can easily define what you find comfortable.
Example: Resolution is set to 1920 x 1200 and option selected is “Stretch the virtual machine to fit the screen”. 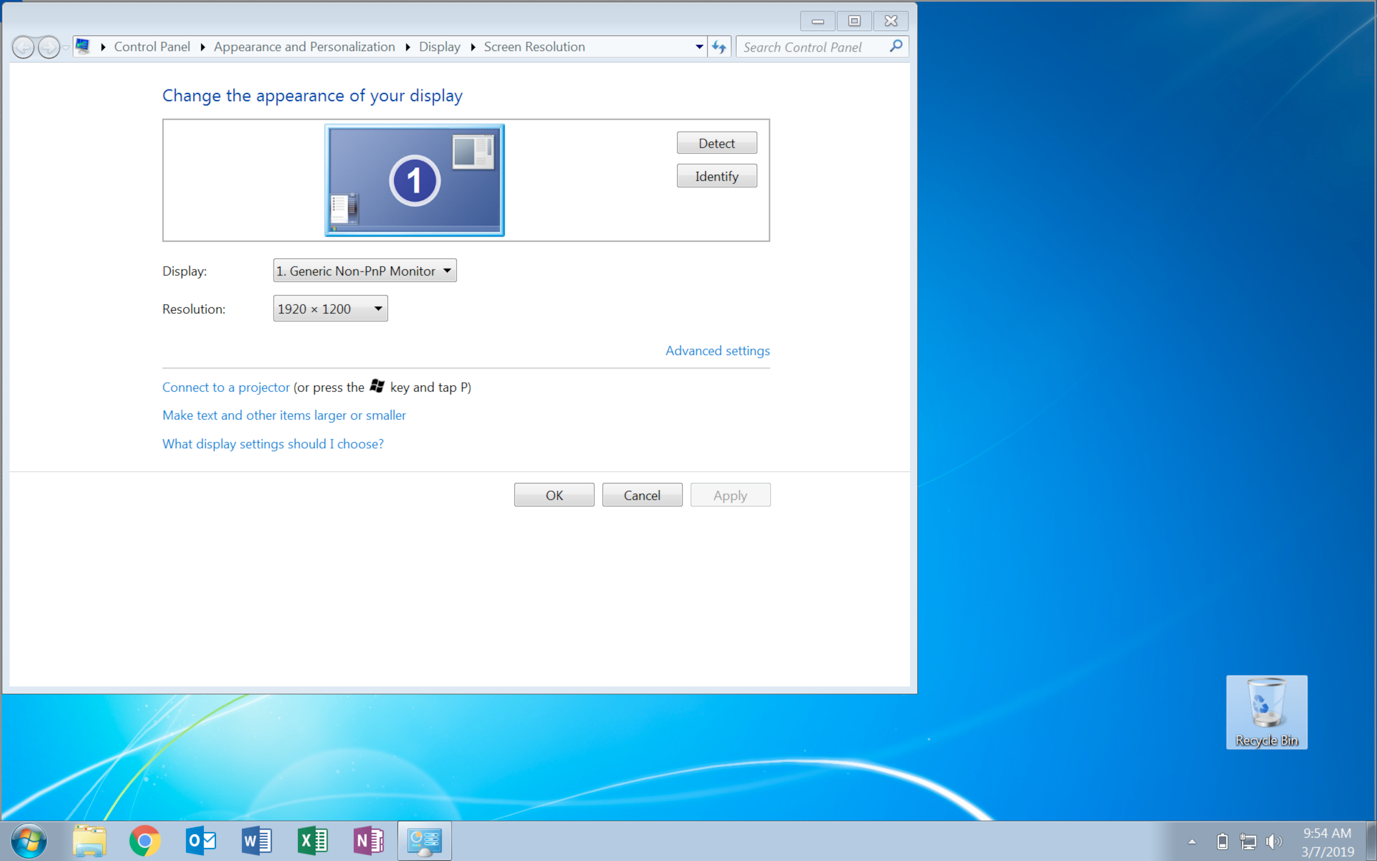
As you see, I got a full screen, while sacrificing a little bit of resolution because of the stretching. This way, stuff is a little bit bigger, which I find more comfortable to view.
Option 3: Resize the virtual machine to fit the screen
Explanation: This option will automatically change the resolution within the vm towards the highest possible value that is possible on your screen, while being in Full Screen. On my 13’ MBP, this will change the resolution automatically towards 2880 x 1800. After you selected this option, you can change the resolution again within the vm. But as soon you leave the view or go towards another screen, it will change the resolution back towards the highest possible value. In this option, selecting different Resolutions is therefore not really possible, since VMware Fusion will always force the best resolution for you.
Example: Resize the virtual machine to fit the screen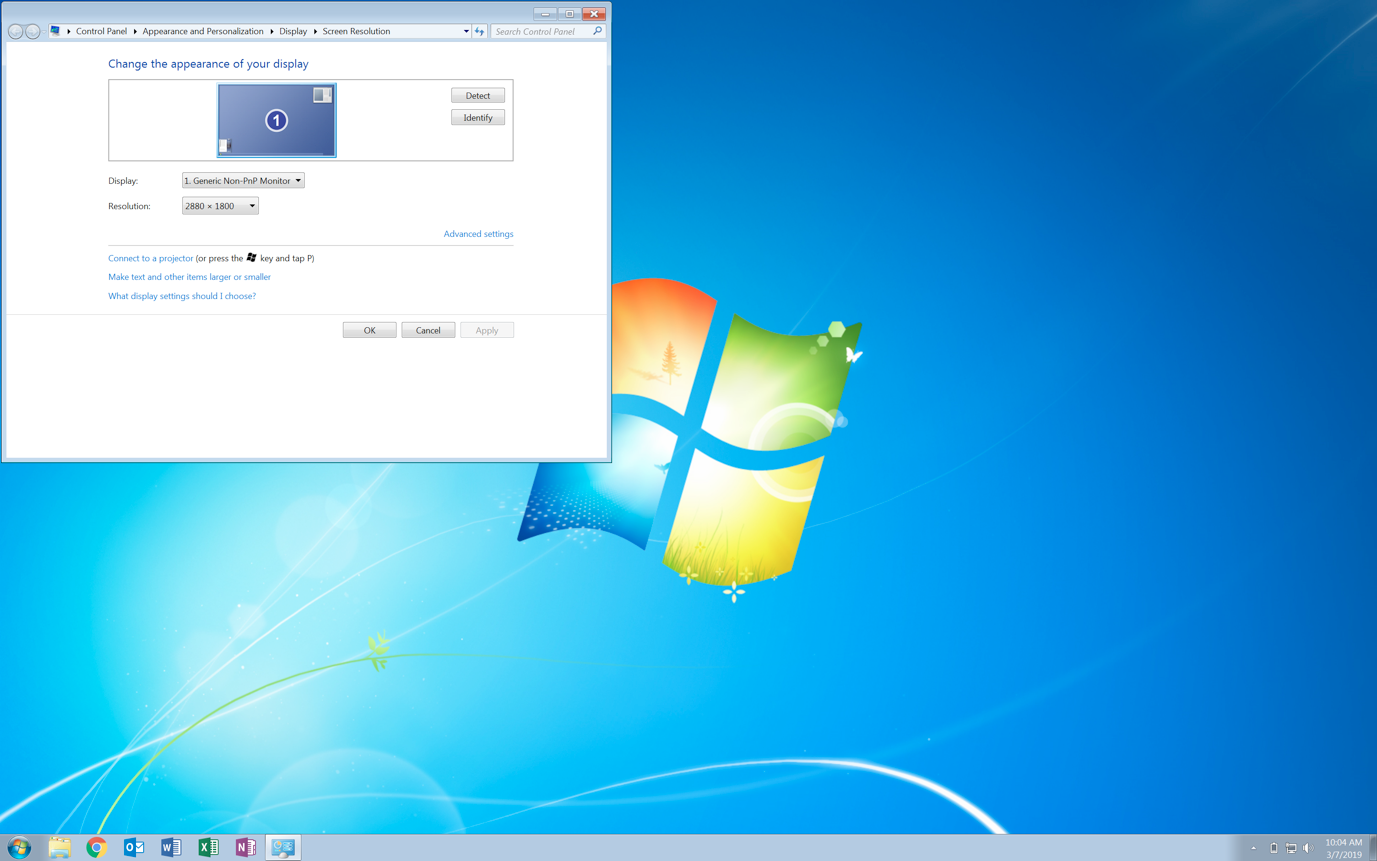
While changing the display options, VMware tools can popup with the following notification. So it sometimes need a logoff for the effects to take place.
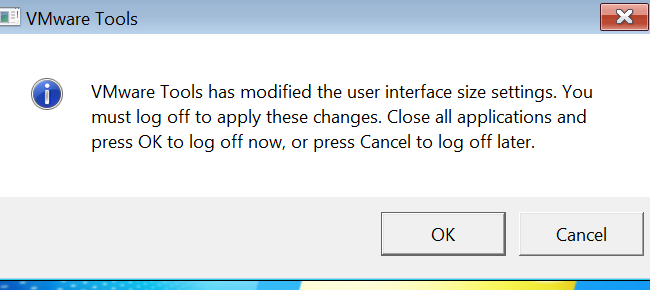
More importantly to know is that these options are mostly possible because of VMware Tools. If you don’t have VMware tools installed, your resolution and resizing of windows can be limited or behave differently. It is also good to know, that a repair of installation of VMware Tools will most of the time result in the default settings that you configured earlier in the Fusion Preference tab.
Hope that this helped and that you got some value out of it.
Have fun playing 😊.
Samir
Samir is the author of vSAM.Pro & a Life enthusiast who works as a consultant in the field of IT. With a great passion for Tech & Personal Development, he loves to help people with their problems, but also inspire them with a positive outlook on life.
Besides that, he is also a big Sport & Music junky that loves to spend a big chunk of his time on producing music or physically stretching himself.
